Doing a painting start to finish
Following what I wrote in, “How I Start A Wildlife Painting”, I thought that it might be interesting actually to do a wildlife painting, from concept to completion, step by step…taking it through my entire creative process from inception to completion, or hopefully to completion….
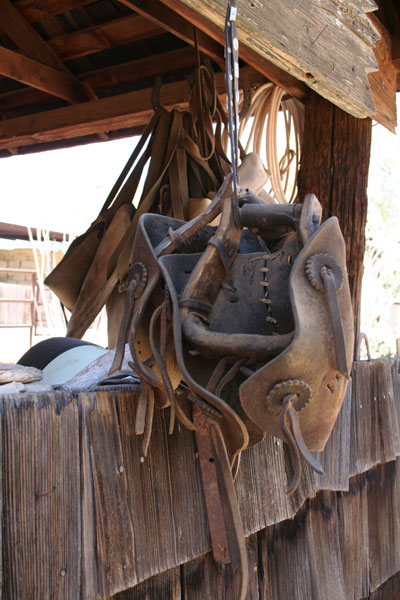
With this “Work in Progress Study”, I obtained most of the photographic reference at the Kay-El-Bar Dude Ranch near Wickenburg, Arizona. On a hunch I had called them, saying that I’d like to visit the ranch to see if I might be able to find some potential subject matters for my artwork and they were more than receptive…. During my tour of the Kay-El-Bar, I noticed a pair of old stirrups, hanging by a thin silver concho belt, under the eave of an old a shed, the stirrups were covered by some very old, weathered, leather pieces they seemed to have some unique qualities ….and when I asked what the leather pieces were I was told that they were “Tapedero’s” and that their purpose was to protect the cowboy’s feet and boots when they are riding through the desert. The southwest desert is filled with mesquite and various cacti that can easily penetrate a cowboy’s boots….Tapedero’s originated in Mexico where the riders don’t wear the same high heeled boots as they do in the states and not only would they protect their feet, but they would keep them in the stirrups as well.
The more I looked, the more I liked what I saw, so, I took several shots of the Tapederos… Among other aspects, I liked that they were different, possessing wonderful shape(s), various surfaces and textures, and at that moment they had wonderful lighting…they seemed to have all of the ingredients for a unique wildlife painting, one that would hold my interest and passion over the length of the process.…. To that end, this is the original image that I took of the Tapederos that I’ll be using for the purposes of this work-in-progress painting….
Additionally, per my normal process, I’ve already added several other elements to the complete the final composition of the painting. In this case though, for the purposes of this process, I won’t show you the entire layout….. Rather than that, I’ll build this particular wildlife painting, piece by piece throughout the work-in-progress of the painting.
***
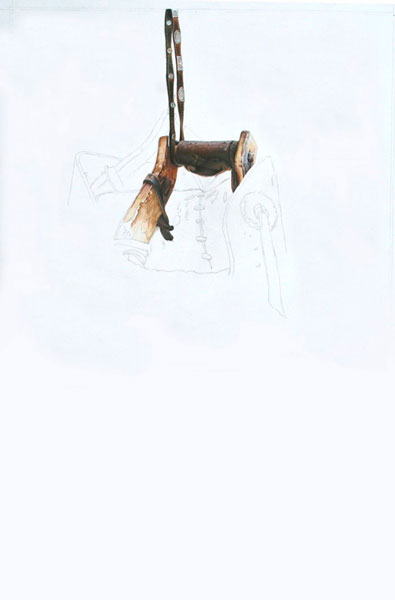
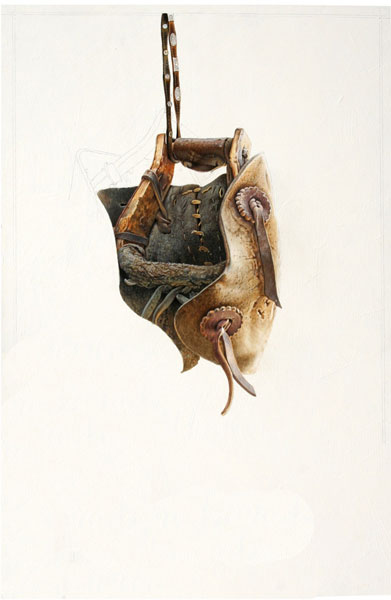
As I mentioned in “How I do a painting”, I start by preparing my painting surface with a several layers of gesso. Then I’ll begin to transfer the image, by tracing my drawing onto a frosted-acetate film, then transferring it again onto the Gesso’d surface by tracing over a graphite sheet. I Use one large sheet of frosted acetate film that will accommodate the entire painting, this sheet has registration marks on it so that I can position it perfectly time and time again onto the painting surface. Given that my work is so highly detailed, I only transfer small elements, or sections at a time, treating each of these small areas as paintings unto themselves, fitting them together, one after another, ultimately building a complete painting. To that end, in this first, panel I’ve started by transferring the Concho belt and top portion of a stirrup and Tapedero. As I complete one section and then start on a new section, invariably I’ll go back and work on any contrast, or color issues, that arise when I place the hues of one section, against the hues of another.
***
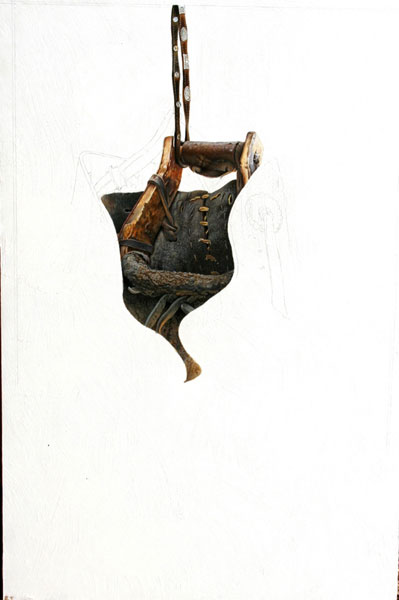
In this step, I’ve continued to build the painting by completing the wood of the stirrup, filling in the inside leather of the Tapedero, adding the connecting straps, leather stitches, the muddied surfaces. As well as, beginning to show some initial signs of indirect sunlight that is hitting the surfaces of the straps beneath the stirrup.
I generally try to build my colors, working in “glazes” and “washes” as an end result, they’re much more vibrant and alive than an opaque tone. To that end, unless it’s absolutely necessary, I very seldom work in opaque colors. Plus, by building my colors one wash at a time, I can work slowly towards the proper level of hue and contrast….I always have a handy hair dryer to hasten the drying time when doing numerous glazes.
***
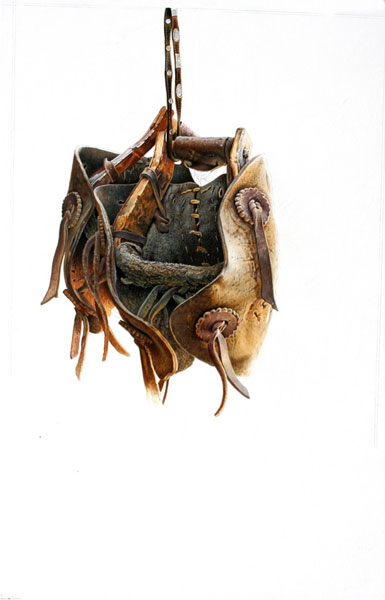
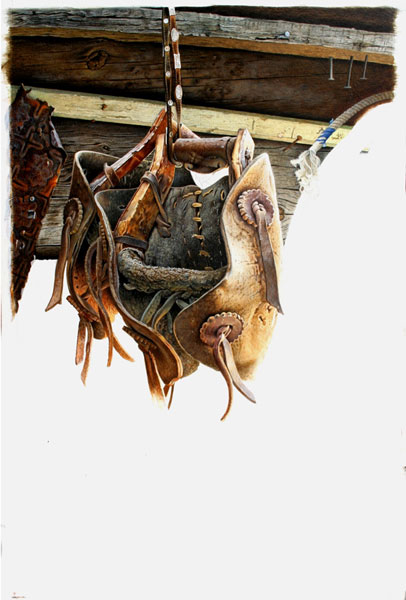
In this panel, instead of going along with what I’d transferred initially, I chose to add the outer portion of the tapedero, along with the leather rosettes and thongs. I did this so I get a feel for where I was with obtaining the overall contrast and the lighting that I wanted to achieve for the painting…. given that this element is going to be one of the brightest areas of the painting it gave me a reference point for my values and levels of contrast for all of the current elements, as well as those yet to come.
***
At this point, I’ve completed most of the Tapedero’s wooden and leather elements… and more importantly all of those directly influenced by direct and indirect sunlight. The only leather elements yet to be completed are the two long thongs that hang down from the underneath of this grouping of objects. I’ll leave those be at juncture, accomplishing them later as I move down towards the lower portions of the painting….
***
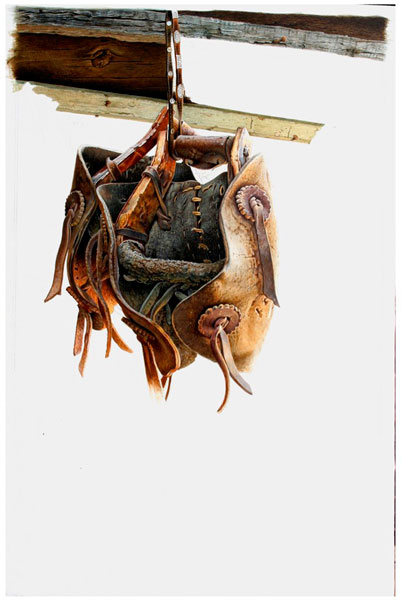
Now you can see a portion of the new background that I’ve selected for the painting … It’s a backdrop of an old log cabin, with various types of logs, wood lathing, tin, rope etc.etc….this is where values start to play an increasingly important role….with a dark background components playing against the hues of the elements in the foreground.
***
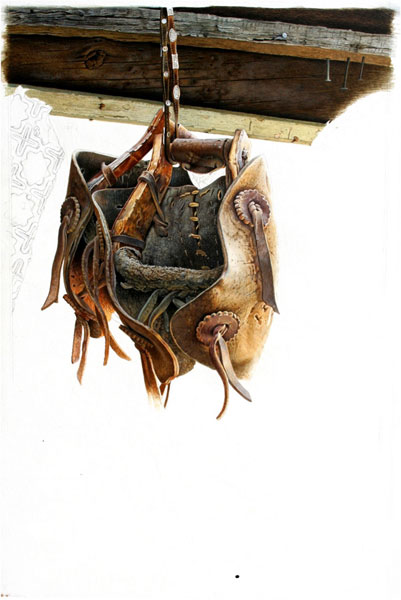
The upper wooden elements are now sufficiently in place…. I have enough detail and high lighting on the log and lathing strip to bring in the embossed ceiling tin element on the left and what will soon be some coils of rope on the right. The Conchos and leather belt are reading very well against the background and as I bring down the darker hues behind the sun struck areas of leather on the Tapedero’s, they should start to “pop” as well…..
***
At this juncture, I have basically finished the old piece of embossed ceiling tin that appears on the left of the side of the painting and now I’m working on the wood that runs behind the stirrups as well as starting to bring in the coil of rope that I mentioned earlier. Insofar as the wood that I’m currently doing, I’ve laid in some general detail and tone, working to build the right hues and values consistant with the elements on that plane. Once I’ve established what I feel is a satifactory relationship with the surrounding elements, I’ll go back in and complete the final detail and surface structure of the wood… and then progress onto the rope, as well as the small open area at the top of the stirrups….
***
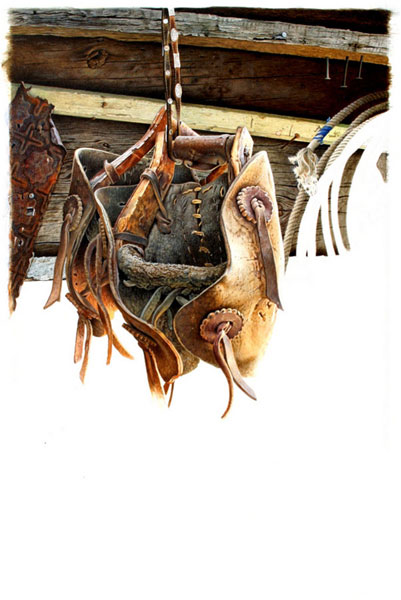
For all intents and purposes I feel that the stirrups are now complete, with the exception of the leather straps that extend down below the Tapederos, as well as any contrast changes that may have to occur later. Now I’ve begun to focus on the coils of rope that occupy the furthest right hand portion of the painting. At the same time, starting to work on the mortar that is foundbetween the logs that form the wall in the background. As I start to move lower in the painting, the back ground lighting will start to shift to have more of a relected light feel…and I’ll start to introduce some additional elements in the foreground….
***
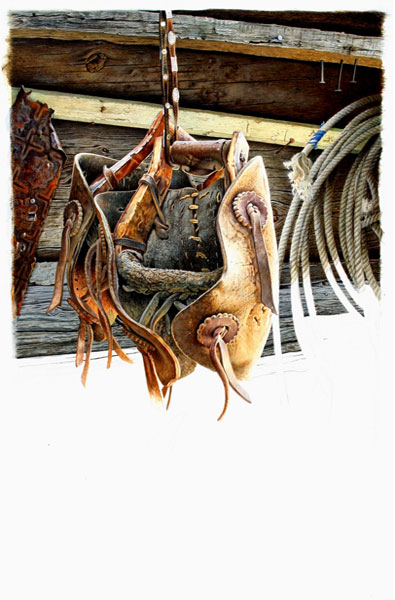
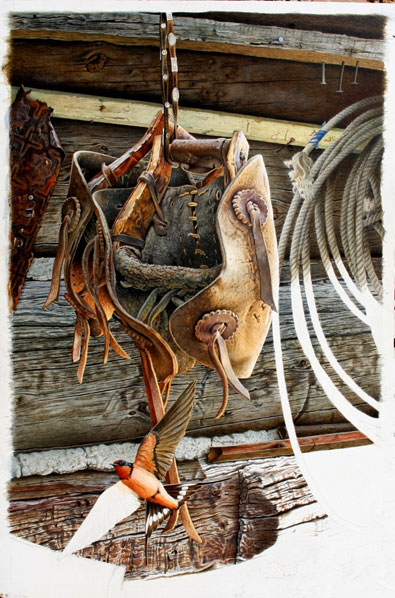
I’ve finished “roughing in” the coils of rope that will occupy the right hand portion of the painting. Insofar as textures and surfaces go, this type of livestock rope, as it wears it starts to have a frayed surface… and capturing the quality of that surface has required a lot of time and attention. So, in order to move the painting along, I’ll continue to work on the rope as I start filling in the remaining of the elements of the painting. As you’ll notice, I’ve already moved down to the next log down on the wall and very shortly will be bringing in the first indications of the Barn Swallow(s).
***
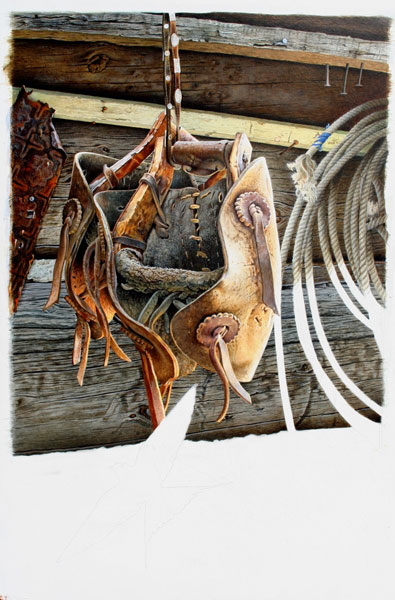
As you can see I’ve fleshed out the remainder of the log, as well as re-touching and re-shading some of the points where the edge of the foreground elements touched the grain of the log appearing through the apertures left by same. The triangular shape appearing along the bottom left center of the log is going to be the upper wing of the Barn Swallow darting by the Taperdero’s…. I’ll be working on the mortar between the two lower logs and the Barn Swallow next….
***
As you can see, in this panel, I’ve added the mortar between the logs, as well as two small pieces of support lathing. Also, I’ve started to rough in the Barn Swallow as well as the log structure of the log surrounding the shape of the bird. This will allow me to establish my initial contrast(s) between the Barn Swallow and the surrounding background elements…. This is a very gradual glaze, by glaze, process because, in my mind’s eye, I’ve plan for a very subtle shift in contrast and tone between the two planes.
***
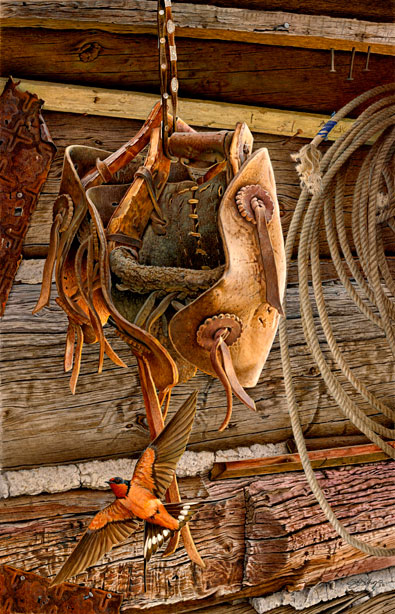
At last, this is the painting in its final form….
As with any realistic painter, if you’d choose to, you can keep going, on and on, adding more and more detail on a never ending basis. For myself, I just come to an end in my mind. I then walk away from the painting, leaving it out of sight for two or three days. Then when I return, it’s with fresh eyes. I scan it over, seeing if anything readily jumps out that needs attention, if so, I’ll make any changes I feel necessary, never spending more than a day…..then, I sign it, seal it with Damar Varnish.
Lastly, I have all of my paintings professionally photographed, using the images for press releases, prints, giclees or any additional advertising. Then it’s to the framers, in my case I use Frame Workshop, in Scottsdale…they’re great folks, extremely professional and have a fabulous selection of moldings.
